A clogged grease fitting represents a failure at the interface of material science and maintenance practice. The root cause is typically the separation of grease, where the base oil bleeds out, leaving behind a hardened soap thickener that physically blocks the internal mechanism. Contamination from environmental ingress through an unprotected or under-filled fitting exacerbates this by introducing abrasive particulates into the grease matrix.
Chemical contamination from mixing incompatible grease types presents another major risk. Introducing a grease with a different soap thickener chemistry, for example mixing lithium complex with polyurea, can cause a rapid reaction, forcing immediate oil separation and forming a hardened, crust-like blockage much faster than normal aging. This blockage directly interferes with the engineered function of the fitting’s internal check valve.
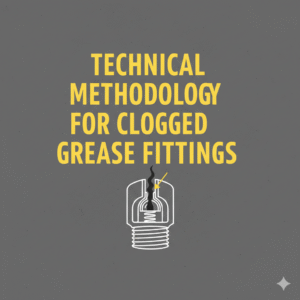
This valve consists of a ball, a spring, and a formed lip within the hollow shaft, assembled to create a one-way seal. Under normal operation, pressure from a grease gun overcomes the spring force, unseating the ball to allow grease passage; pressure from the bearing cavity then reseats the ball to prevent backflow, a function validated by the manufacturer’s back pressure test. Before diagnosing a physical clog, consider hydraulic lock from trapped air.
If the bearing cavity or the fitting’s shaft contains a pocket of compressed air, it can act as a spring, preventing the grease gun’s pressure from building sufficiently to unseat the ball valve. This is especially common in sealed systems or after component reassembly. A diagnostic method is to slightly loosen the fitting or a nearby housing vent, if equipped, to bleed air while applying grease gun pressure.
A physical clog occurs when hardened debris or separated thickener fills the hollow zerk shaft itself, preventing the spring from compressing and effectively gluing the ball check shut in its seated position. This renders the fitting inoperative for both grease input and seal retention.
When a user encounters a situation where a grease fitting won’t take grease, the appropriate repair methodology is fundamentally guided by a systematic diagnostic sequence and the fitting’s manufacturing process. The first action must be to confirm the grease gun itself is functional and its coupler is properly engaged on the fitting.
Use a different, known-good grease gun to rule out a faulty coupler or insufficient gun pressure. If the fitting still refuses grease, employ a needle-nose adapter on the grease gun. This tool bypasses the ball check mechanism entirely, injecting grease directly into the cavity behind the fitting.
If grease flows freely with the adapter, the check valve is confirmed clogged and the subsequent clearing procedures are valid. If grease still will not enter, the blockage resides within the machinery itself, such as in a blocked relief port or a fully packed bearing, making any fitting-focused clearing attempt futile and necessitating component disassembly. For a confirmed fitting clog, the clearing technique is guided by the fitting’s manufacturing process, specifically case hardening. This thermal-chemical treatment involves heating the steel fitting to an austenitizing temperature in a carbon-rich atmosphere, allowing carbon absorption into the surface layer.
A subsequent quench in oil transforms this high-carbon surface into extremely hard martensite, after which the part is tempered to scale back brittleness to a specified balance of hardness and toughness. This process creates a wear-resistant surface capable of withstanding high pressure and mechanical impact, as validated by standardized impact tests where a weight is dropped in free fall against the fitting.
Consequently, applying lateral or torsional force with a wrench or pliers to a clogged fitting is a high-risk procedure. The case-hardened material, while hard, has reduced ductility. Excessive leverage can cause the nipple to shear at its base rather than bend, leaving the threaded shank embedded in the equipment and requiring extraction. This risk is heightened with low-quality fittings that may not have undergone proper heat treatment or testing, making them susceptible to deformation or failure under stress.
It is equally critical to understand the pressure limits of the lubrication system. A standard manual grease gun can generate over 10,000 psi. When faced with an absolute clog, “dead-heading” the gun risks exceeding the burst pressure of the grease hose or, more dangerously, failing the internal seals of the bearing or component housing itself. This can cause catastrophic lubricant loss and component damage before the fitting ever clears.
The validated method for addressing a clog involves understanding the fitting’s pressure thresholds, as determined during manufacturer performance testing, such as opening pressure and operating pressure. The application of localized heat from a heat gun is thermally safe for the case-hardened steel and serves to lower the viscosity of the hardened blockage.
It is imperative to avoid using an oxy-acetylene torch or direct open flame, as this can locally anneal and soften the case-hardened steel or overheat and degrade adjacent seals and bearings. The heat gun’s controlled liquefaction reduces the blockage’s resistance below the fitting’s designed opening pressure, allowing a grease gun to overcome the spring force and clear the passage. This approach aligns with the material’s thermal stability imparted during the tempering stage of case hardening.
For persistent clogs, a grease fitting unblocker tool is used. This tool delivers a sudden hydraulic shock via a hammer strike, driving a light oil or solvent through the orifice. The fitting’s ability to withstand this specific type of kinetic impact is a direct result of the case hardening and the impact testing it underwent during production, which simulates this exact force. A properly manufactured fitting will survive this transient pressure spike without deforming the internal lip that retains the ball and spring.
Using excessive force or improper tools, or using this method on a low-quality fitting, risks collapsing this internal lip, permanently ruining the bearing seal. Following any successful clearing procedure, whether by heat or shock, the final critical step is to pump grease through the fitting until fresh, clean grease purges from the bearing’s relief port or seal. This validates that the entire grease passage is clear, flushes out any remaining debris or solvent, and re-establishes the proper positive pressure within the lubricant cavity.
When a fitting cannot be cleared and requires replacement, removal techniques must again respect the material’s properties. For threaded fittings, proper engagement with a correctly sized wrench is critical. Upon installation of a new threaded fitting, apply a compatible liquid thread sealant to the threads. Avoid using PTFE tape, as shredding tape can contaminate the lubrication system.
Torque the fitting to specification to avoid distorting the housing threads. For drive-in (press-fit) fittings, the removal process typically involves gripping with vice grips, applying rotational force to break the interference fit, and then extracting. The hardened surface provides grip for the tool jaws, but a direct pull without first loosening the fit risks a brittle shear failure of the nipple.
The long-term prevention of clogs is rooted in lubrication management. Municipal DPW fleets in Ulster County often run seasonal equipment with long storage intervals. Extended idle periods promote oil separation and internal hardening of grease columns in fittings. Consistent, frequent greasing with the correct specification of grease maintains a positive pressure of fresh grease, preventing oil separation and creating a seal against contamination.
Automated lubrication systems provide the most effective implementation of this principle by delivering precise, metered volumes of lubricant at regular intervals during machine operation. This ensures consistent purging of the entire bearing cavity and grease passages, preventing the stagnation and separation that lead to blockages, thereby protecting the integrity of both the fitting and the component it serves.
Return to the complete Hydraulics Guide.